This week the primary tasks I accomplished involved refactoring the line renderer for tethered players and allowing slope movement for characters.
The line renderer for the tether needed to be re-factored for a little bit now due to the temporary nature of its implementation. In the gif below which I posted last week on my throwing and picking up post, you can see that the line on the player is moving ahead of the player.

This is because the line connecting code was embedded in the fixed constraint code. As the fixed constraint system is always trying to reach a target, the line render target was also looking into the future position of the player rather than the current position.
In addition, there was no controller allocated for each players rope, meaning that allowing for more complex control of the line renderer becomes difficult. So my plan was to de-centralise the line render from the fixed constraint system.
It was a simple enough matter to copy the functionality from the FixedConstraint code and put a script onto the player. The way I decided to create the functionality was to make function call to EHU to return the list of gameobjects that make up the physical rope. Then, I can make a new list of LineRenderers by getting each gameobject in the list and getting their line render component.
ropeSegs = ehuRope.ReturnRope(ps.playerNum);//get the rope list
for (int index = 1; index < ropeSegs.Count; ++index)//skip EHU
{
LineRenderer temp = ropeSegs[index].GetComponent<LineRenderer>();//add the line renderer components into a list so we can use it
ropeLineRends.Add(temp);
//temp.enabled = true;
}
Then we can turn on the lines on the rope and update their render targets through the list.
for (int index = 0; index < ropeLineRends.Count; ++index)
{
//set the start position of the line to the segment pos
ropeLineRends[index].SetPosition(0,ropeLineRends[index].gameObject.transform.position);
ropeLineRends[index].SetPosition(1, ropeLineRends[index-1].gameObject.transform.position);
…
}
Now the rope is in the world for each player, and updates correctly per frame. However, the primary effect that our Designers wanted from the new system was a “reverse vacuum” effect, where the tether spreads from EHU to the player. This is something that we have to enable on the line render system itself, but fortunately is easy. We can simply turn on each segment one at a time over a period of time until all of them are turned on.
We can do this easily by having an external index counter keeping track of what element is turned on, and iterating it each time the timer has gone below zero.
if (animateIndex < ropeLineRends.Count && timer <= 0)
{
AnimateRope();
tempTime = ropeTime / ropeLineRends.Count;
timer = tempTime;
}
You can see I divide the tempTime. This is so that the given time is spread over each segment, so that the effect happens over the entire rope and not a single segment. Then in AnimateRope I simply turn on the line renderer at the index, then iterate the index.
void AnimateRope()
{
ropeLineRends[animateIndex].enabled = true;if (animateIndex > ropeLineRends.Count)
animateIndex = 0;else
++animateIndex;
}
This creates the cool vacuum effect over the given time period.

Next, I implemented slope movement on the player.
As we use a custom velocity for the player and EHU, we need to manually implement some things like slope movement. This is due to the complex nature of the tethering system and how we apply force to the player. A side effect of this is that players can’t walk up slopes.
My plan of action was to do a raycast in front of the player, and offset the hit location by the point right in front of the player. This would mean that a player would move “upwards” every frame if there is a slope in front of them.
However, this system requires more complexity to make it work properly. Using the above system, the player stops moving on a slope if the raycast hits flat ground, regardless if the player is still on a slope or not. To compensate, I use another raycast directly below the player.
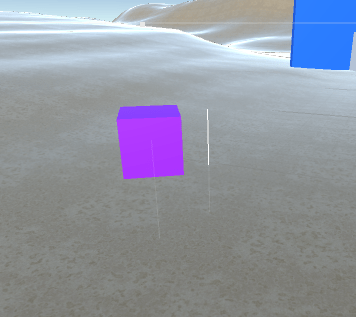
I then check the following logic for movement on flat and sloped terrain:
if (angle1 > 0 && angle2 < 5)//if first cast isn’t flat, but one below is
if (angle1 > 0 && angle2 > 0)//if both casts are angled
else if (angle1 < 5 && angle2 > 0)//if first cast is flat, but we’re on slope
The first two checks we can simply offset the ray hit location by the player scale, and then diffing the result with the player position. This means the y direction of the player will be up the slope.
tempDir = (hit1.point + (transform.localScale));
tempDir = tempDir – transform.position;
return tempDir.y;
However we can’t do this if we’re moving off a slope onto a flat surface, as the math would make us move into the slope. To fix this, we had to use the players second raycast and reflect it.
tempDir = Vector3.Reflect(_dir, hit2.normal);
return tempDir.y;
This simply “bounces” the players movement off the surface normal so their movement continues going upwards.
![slopes[1].gif](https://i0.wp.com/calebbarton.dev/wp-content/uploads/2017/06/slopes1.gif?resize=490%2C447&ssl=1)
One thought on “Final Project Week 4: Line Renderers and Slopes”